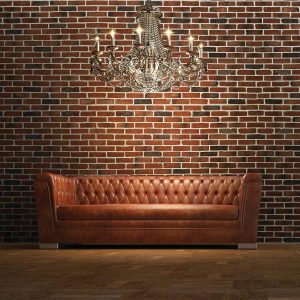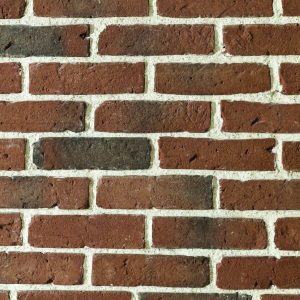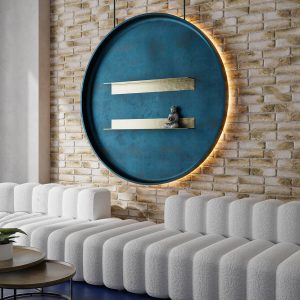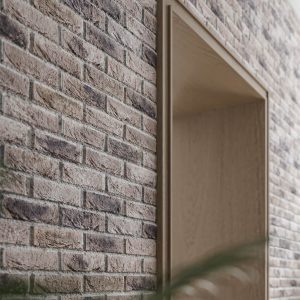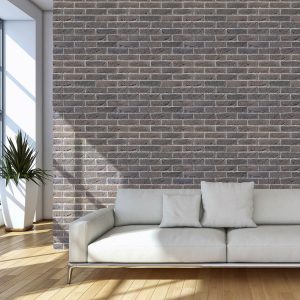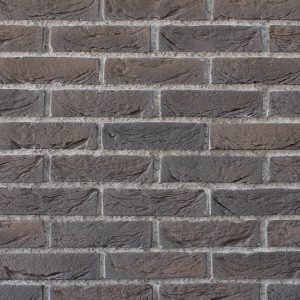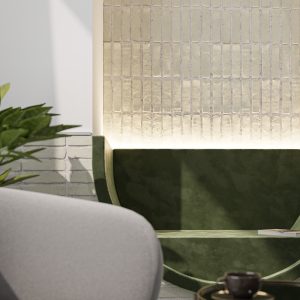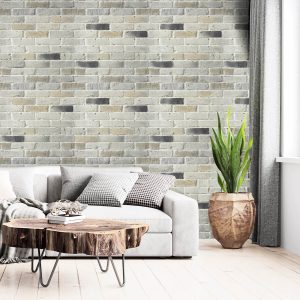
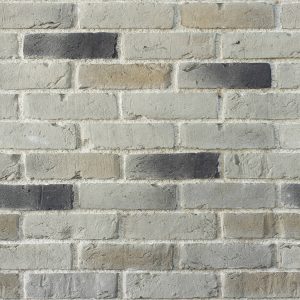


Cement-based decorative solution mimicking klinker brick, ideal for modern klinker spaces.


- Description
- Technical Specifications
- Quantity calculator
- User Guide
- F.A.Q.
- Product information request
Description
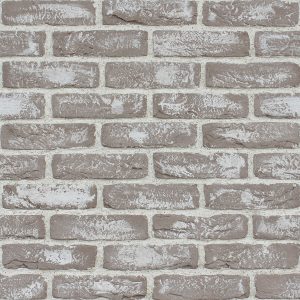
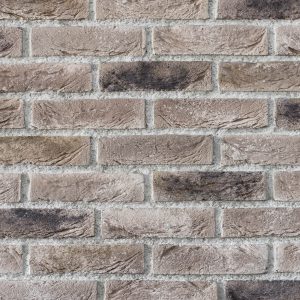
In the dance between light and shadow, Breda Dirty White brick emerges, with its dirty white hue adorned by dark grey accents. Like whispers of forgotten stories, it carries an air of mystery and intrigue.
Technical Specifications
Product Data
| Shape | Soft rectangle  |
|---|---|
| Dimensions | 20.9 – 21.3 x 6.2 – 6.3 cm |
| Thickness | 1.5 cm |
| Color | Beige, Grey, Multicolor, White |
| Material | Cement based |
| Reaction to fire | |
| M Classification |
Packaging
| Pieces per box | 63 |
|---|---|
| Coverage per box | 1.00 sqm ±5% with grout joint 1.0 cm / 0.83 sqm ±5% without grout joint |
| Weight per box | 22.50 kg |
| Packaging type | Recycled cardboard box – 80% |
Installation
| Installation style | |
|---|---|
| Recommended joint width | 1.0 cm |
| Requires adhesive | Yes |
| Average weight/sqm | 21.90 kg ±5% - Calculated with a joint width of 1.0 cm. The weight of the joint is not included in the calculation! |
Loading calculator options…
Recommendations and specifications
Installation surfaces: Plaster, plasterboard, bricks, concrete, concrete bricks, plastered/rendered surfaces, wood, ceramic tiles, depending on the specifications of the used adhesive. The surface on which the product is installed must be in good condition, dry, dust free, stable, and protected against water infiltration.
Exceptions: The products should not be installed on the floor, ceiling, on surfaces or in areas with high humidity, or exposed to temperatures higher than 70 °C.
The back of the tiles must be dry and free of dust, oils, or other non-stick substances.
Product storage
The product must be stored in covered spaces that are protected from humidity or precipitation.
Installation instructions
- Draw level lines for every second row of product, taking into account the joint width indicated in the “Recommended accessories and average consumption” table.
- Preselect the decorative tiles and mix them from different boxes.
- Cut the tiles to the desired size, if necessary.
- Smooth the edges and brush the back of the decorative tiles with a wire brush for better adhesion. Make sure the back of the tiles is clean and dust free.
- Apply the adequate adhesive for the support, on both the installation surface and the back of the tiles.
- Apply the decorative tiles to the installation surface, spaced according to the joint width indicated.
- Fill the joints with grout, 24 hours after installation.
- Smooth the semi-dry grout using a joint spatula and gently brush the joint surface.
Maintenance
- Use only PH-neutral detergent solutions for cleaning the tiles.
- Clean the tiles with a vacuum cleaner but avoid direct contact of the nozzle with the wall cladding.
- Do not clean the tiles with high-pressure devices, abrasive materials, or excessive force. Otherwise, you may risk damaging them.
- For deep stains, seek professional advice. Avoid using non-specific cleaning products.
- Consult the producer’s product range for specific cleaning and protection solutions.
It depends on the type of product. Tiles marked for interior use only are intended exclusively for indoor spaces and are not recommended for areas with high humidity or direct exposure to water. Products marked for both interior and exterior use can be installed in either environment, provided that the installation recommendations specific to the product are followed.
MODULO products are intended for vertical surfaces. Depending on the product and the adhesive used, they can be installed on concrete, plaster, masonry, AAC blocks, plasterboard, rendered surfaces, fibre cement, wood, OSB, MDF or ceramic tiles. The substrate must be stable, level, clean and dry. MODULO products are not intended for installation on floors or ceilings and must not be used as paving.
The substrate must be stable, level, clean and dry, and free from dust, grease, paint, wallpaper or any other material that could reduce adhesion. For exterior applications, the substrate must be adequately protected against water infiltration, and construction details should prevent water from penetrating behind the cladding.
Yes, products intended for exterior use can be installed on plinths. However, the foundation and substrate must be adequately protected against moisture and water infiltration from the ground. Appropriate waterproofing is recommended, together with a drainage system where necessary to limit capillary moisture. The cladding should not come into direct contact with the ground.
Yes, provided that the wall or fence is adequately protected against water infiltration. Waterproofing and, where necessary, suitable drainage are recommended. The cladding should not come into direct contact with the ground. For areas with greater exposure to moisture, natural stone from the Natimur range is a suitable option when installed with an adhesive appropriate for exterior conditions.
It depends on the product and the area where it will be installed. Gypsum-based products are not recommended for spaces with high humidity or areas with direct and continuous exposure to water. In bathrooms, installation should be avoided particularly inside showers, around bathtubs or in other areas frequently exposed to water and steam.
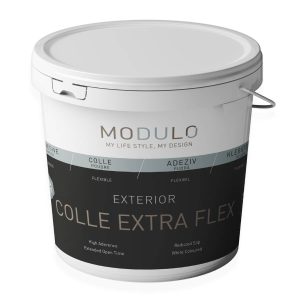
The adhesive should be selected according to the type of tile, the substrate and the installation area. For exterior cement-based or natural stone cladding, we recommend MODULO Colle Extra Flex, a flexible cement-based adhesive classified C2TES1. For most interior applications, MODULO Adhesive, a ready-to-use D2-class paste adhesive, can be used. Always follow the instructions provided for the selected adhesive.
Yes, but the tiles must not be bonded directly onto the thermal insulation material. For installation on thermal insulation systems, we recommend using adhesives compatible with ETICS systems, together with a suitable reinforcement mesh. The specifications and installation requirements of the thermal insulation system manufacturer must always be followed. For thick thermal insulation systems or special installation conditions, consult the manufacturer of the thermal insulation system before installing the cladding.
For thermal insulation systems, a suitable reinforcement mesh is recommended as part of the substrate preparation before installing the cladding, in accordance with the specifications of the thermal insulation system manufacturer. Reinforcement may also be necessary on weak or unstable rendered surfaces to provide a suitable substrate for the cladding.
We do not recommend bonding the tiles directly over painted surfaces without first preparing the substrate. The paint should be removed or the surface prepared to provide a stable and suitable base for adhesion. On absorbent substrates, a compatible primer may be applied. Always follow the recommendations of the adhesive manufacturer.
Yes, but not directly onto the polystyrene. The thermal insulation system must first be properly prepared with a suitable reinforced layer. The reinforcement system and installation method must comply with the specifications of the thermal insulation system manufacturer.
Yes, but care is required. Thin tiles may crack during drilling, and drilling can affect both their appearance and integrity. For cement-based products or natural stone, use tools suitable for concrete or masonry. For gypsum-based products, tools suitable for working with gypsum may be used. Heavy items such as shelves or TV brackets must be anchored into the supporting wall, not only into the decorative tile.
The cutting method depends on the material. Gypsum-based products can be cut using a hand saw or fine cutting tools. For cement-based products and natural stone, we recommend using an angle grinder fitted with a diamond disc. A hole saw may be used for cut-outs around sockets and switches.
The safest approach is to remove excess adhesive immediately, before it hardens, while avoiding spreading it over the surface of the tile. Once hardened, adhesive is considerably more difficult to remove and cleaning may affect the texture or colour of the cladding. Do not use metal brushes, abrasive materials or aggressive cleaning products. For persistent residues, use only cleaning products compatible with the type of cladding.
Dimensions, thickness and weight vary from one product to another. The exact specifications for each product can be found on its product page under the “Technical Details” section.
As with any material permanently exposed outdoors, slight changes in shade may occur over time due to UV radiation and weather conditions. MODULO products use mineral pigments to provide good colour stability, while certain ranges also receive an additional protective treatment during production.
Dedicated corner elements are available for many MODULO products. Some models use a two-piece corner system designed to create a natural and continuous appearance around the corner.
If dedicated corner elements are not available, external corners can be created by cutting the tiles at a 45° angle or by alternating and overlapping the tiles along the edge of the wall. At internal corners, tiles from the adjoining walls can be overlapped to create a clean transition. The most suitable method depends on the shape and texture of the product and the desired finished appearance.
Products intended for exterior use are designed to withstand normal outdoor conditions and freeze-thaw cycles when correctly installed. However, the cladding itself does not replace the waterproofing of the wall.
The substrate must be protected against water infiltration, and water should be prevented from penetrating behind the cladding. Construction details such as window sills, eaves, canopies and drip-edge profiles therefore play an important role. In plinth areas, suitable protection against moisture rising from the ground must also be provided.
MODULO products are covered by a 2-year commercial warranty. Their actual service life can be considerably longer and depends on the installation conditions, the characteristics of the substrate, exposure to external factors and proper maintenance of the cladding.
A cut edge can be concealed using an L-shaped finishing profile similar to those used for ceramic tiles. The profile covers the visible cross-section of the decorative tile and provides a clean, uniform finish.
Yes, under certain conditions. For interior gypsum-based products, the cladding surface temperature must not exceed 40°C, and we recommend maintaining a distance of approximately 60 cm from strong direct heat sources.
For interior/exterior cement-based or natural stone products, the substrate temperature must not exceed 70°C. The fireplace must be adequately insulated, and the adhesive must be suitable for the temperatures to which the cladding will be exposed.
We do not recommend painting MODULO products, as this may alter the original texture, colour and appearance of the cladding. If paint is nevertheless to be applied, it should first be tested on a small, inconspicuous area. Due to the textured surface of the products, the final result may be uneven.
We do not recommend applying varnishes or other treatments that are not specifically intended for the product concerned.
MODULO Protection Spray may be used to provide protection against water and stains, while dedicated MODULO protection and impregnation solutions are available for exterior products and natural stone. Some products already receive a protective treatment during production, so the product-specific information should always be checked before applying any additional treatment.
Slight variations in shade may occur between production batches. For this reason, we recommend purchasing the entire quantity required for the project in a single order and mixing tiles from several boxes during installation to achieve a natural and balanced appearance.
With natural stone, variations in colour, texture and pattern are inherent characteristics of the material and contribute to its authentic appearance.
For routine maintenance, dust can be removed with a soft brush or vacuum cleaner without allowing the vacuum head to come into direct contact with the cladding. Superficial stains may be gently wiped with a damp microfibre cloth.
Avoid pressure washers, abrasive materials and aggressive cleaning products. Use only cleaning solutions compatible with the type of cladding and with a neutral pH. For persistent stains or natural stone maintenance, we recommend the dedicated MODULO cleaning and protection products. Products from the Signature range do not require additional treatments.
Store the tiles in a covered, dry area and protect them from moisture, weather conditions and mechanical shocks. The products should also be protected against freeze-thaw cycles before installation.
Delivery time varies depending on product availability and the quantity ordered. Products that are in stock are generally delivered within 2–4 working days. For products that need to be manufactured or restocked, delivery may take 5–10 working days or longer, depending on the quantity required.
MODULO decorative cladding products are manufactured at our production facility in Turda, Romania. The Natimur range is made from natural stone sourced from specialised suppliers.
Our products are available in the models, colours and dimensions presented on the website. We currently do not offer made-to-order versions or additional customisation options.
Avoid wiping fresh grout mortar from the surface of the tiles, as this may spread the mortar and push it into the texture of the cladding. If mortar accidentally gets onto a tile, allow it to harden before carefully removing the excess.
Do not use wet sponges, metal brushes or abrasive materials. For persistent residues, use only cleaning products compatible with the type of cladding.
In general, a joint of approximately 1–2 cm is recommended between the tiles. The required width may vary depending on the product, so always follow the joint width specified on the packaging or in the product documentation.
Grouting should be carried out after the adhesive has dried, generally approximately 24 hours after installation. Prepare the grout mortar according to the instructions on the packaging and apply it using a grouting bag, completely and evenly filling the spaces between the tiles.
If mortar gets onto the tile surface, do not wipe it while fresh. Allow it to harden before carefully removing the excess.
Once the mortar begins to harden, generally after approximately 30–120 minutes depending on ambient temperature and the product used, finish the joints with a spatula or suitable jointing tool. For a smooth finish, a rigid rubber or plastic hose or suitable levelling tool can be used. For a more rustic appearance, use a soft-bristle brush. Do not use metal brushes, wet sponges or abrasive materials.
In general, MODULO brick slips are installed with joints, following the recommended joint width for the selected product. However, some products, such as the Easy Brick and Easy Block ranges, have an integrated joint design and are installed without leaving additional spacing between the tiles.